DepthAI 流水线图
最后更新
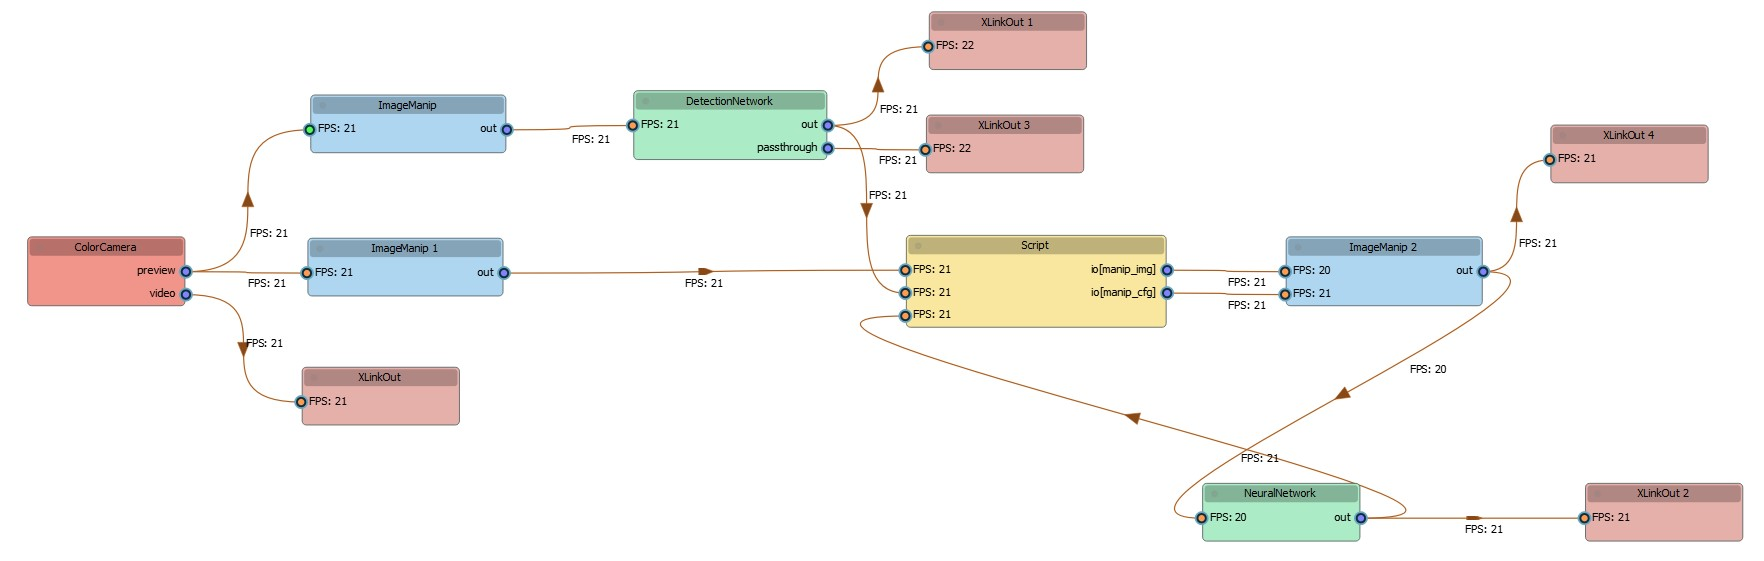
工作原理
DEPTHAI_LEVEL=debug,JSON 配置将打印到控制台:Command Line
1[2022-06-01 16:47:33.721] [debug] Schema dump: {"connections":[{"node1Id":8,"node1Output":"passthroughDepth","node1OutputGroup":"","node2Id":10,"node2Input":"in","node2InputGroup":""},...]pipeline_graph 工具执行以下步骤:- 设置
DEPTHAI_LEVEL=debug - 执行您的代码
- 从输出中捕获 schema dump
- 使用修改后的 NodeGraphQt 版本解析 schema 以创建可视化图
安装
Command Line
1pip install git+https://github.com/luxonis/depthai_pipeline_graph.gitCommand Line
1pip install PySide2运行工具
Command Line
1pipeline_graph -hrun、from_file 和 load。可用操作
- 运行:执行您的 DepthAI 脚本并实时生成流水线图。
Command Line
1pipeline_graph run "python your_script.py"-dnk 选项允许您的脚本在捕获 schema 后继续运行:Command Line
1pipeline_graph run "python your_script.py" -dnk- 从文件:从日志文件或 JSON schema 生成流水线图:
Command Line
1pipeline_graph from_file path/to/your/log_or_json_file- 加载:加载和编辑以前保存的流水线图:
Command Line
1pipeline_graph load path/to/your/saved_graph.json自定义选项
节点命名
ColorCamera (0)),索引表示创建顺序。 如果存在许多相同类型的节点,请使用 -var 或 --use_variable_names 选项将索引替换为代码中的变量名,以提高清晰度。Command Line
1pipeline_graph run "python your_script.py" -var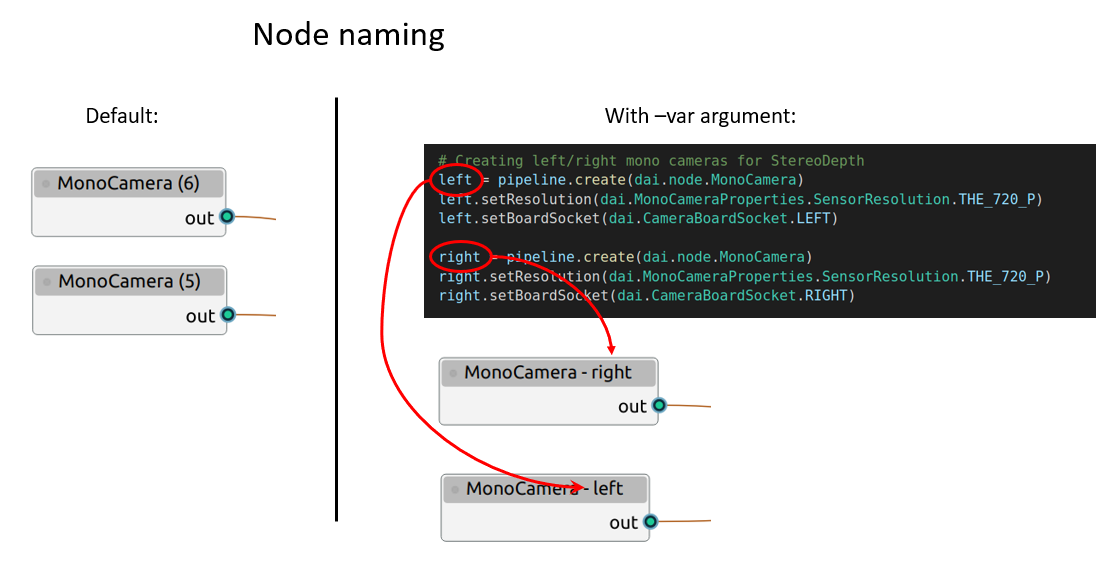
-p 或 --pipeline_name 参数指定另一个名称。Command Line
1pipeline_graph run "python your_script.py" -var -p custom_pipeline_name与图交互
- 重新排列节点:如果默认位置不适合您的需求,只需拖放节点即可调整其布局。
- 重命名节点:双击节点的名称可直接编辑。
- 更改节点外观:双击节点本身(名称区域之外)以打开一个窗口,您可以在其中修改其颜色和名称。
- 上下文菜单选项:右键单击图上的任意位置以调出菜单。从这里,您可以将图保存为 JSON 文件,加载以前保存的图,或访问其他选项。